jetson electric bike manual
Jetson Electric Bike Manual: A Comprehensive Guide
Welcome! This detailed manual expertly guides you through setup, operation, and maintenance of your new Jetson Electric Bike, ensuring a seamless riding experience.
Congratulations on choosing a Jetson Electric Bike! You’ve invested in a modern, efficient, and enjoyable mode of transportation. This bike blends cutting-edge technology with a sleek design, offering a fantastic alternative to traditional cycling or short vehicle trips.
This manual is designed to be your comprehensive resource, walking you through every aspect of your new e-bike. From initial unboxing and assembly to understanding the intricacies of the electrical system and performing routine maintenance, we’ve got you covered. We aim to provide a step-by-step guide for a seamless setup.
Before your first ride, carefully read this manual to familiarize yourself with all the features and safety precautions. Understanding your bike’s components and how they work will enhance your riding experience and ensure your safety. Get ready to explore the world with the power and convenience of your Jetson Electric Bike!
Unboxing and Initial Inspection
Carefully unpack your Jetson Electric Bike, taking inventory of all components. The box should contain the bike frame, front wheel, rear wheel (potentially attached), handlebars, pedals, battery, charger, and any included accessories. A detailed packing list is usually provided – verify everything is present.
Inspect the bike frame for any shipping damage – dents, scratches, or misalignment. Check the tires for proper inflation and any signs of defects. Examine the handlebars and stem for secure attachment points. Ensure the battery is securely packaged and shows no visible damage.
Report any missing or damaged parts to the retailer immediately. Do not attempt to assemble or ride a bike with damaged components. Retain all packaging materials until you are satisfied with the condition of your new Jetson Electric Bike. A thorough initial inspection is crucial for a safe and enjoyable riding experience.
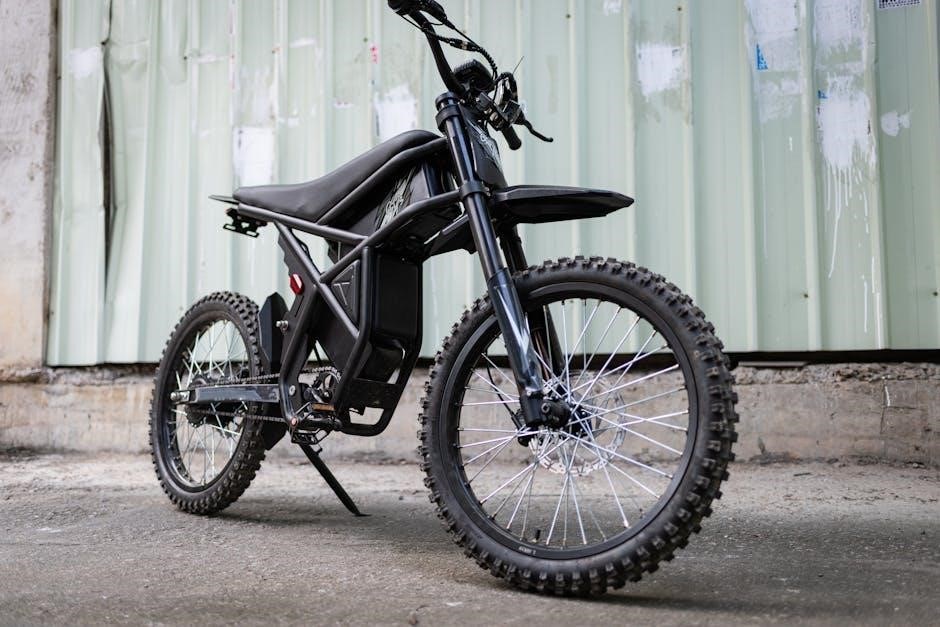
Component Overview
Your Jetson Electric Bike comprises several key components working in harmony. The frame provides structural support, typically constructed from aluminum alloy for lightweight durability. The motor, usually located in the wheel hub, delivers power assistance. A controller manages the motor’s output based on your throttle input or pedal assist level.
The battery, often lithium-ion, stores the energy powering the motor. Handlebars control steering and feature integrated controls for throttle, brakes, and display; Brakes (disc or V-brakes) ensure safe stopping power. Wheels, tires, and pedals facilitate movement.
A digital display shows speed, battery level, and assist mode. The charger replenishes the battery. Understanding each component’s function is vital for proper operation, maintenance, and troubleshooting your Jetson Electric Bike, maximizing your riding enjoyment.
Frame and Fork
The Jetson Electric Bike’s frame is typically crafted from lightweight yet robust aluminum alloy, balancing durability with manageable weight for effortless riding. Frame geometry is designed for stability and comfort, accommodating various rider sizes. Inspect the frame regularly for any signs of cracks, dents, or corrosion, particularly at weld points.
The fork, usually a suspension fork, absorbs shocks and vibrations from the road surface, enhancing ride quality and control. Suspension forks often feature adjustable preload settings to customize the ride based on rider weight and terrain. Ensure the fork’s stanchions are clean and lubricated for smooth operation.
Periodically check the headset for tightness, ensuring smooth steering without play. Proper frame and fork maintenance are crucial for safety and longevity.
Motor and Controller
Your Jetson Electric Bike utilizes a powerful electric motor, typically located in the rear wheel hub, providing efficient propulsion. The motor’s wattage determines its power output and speed capabilities. The controller acts as the brain of the e-bike, regulating power delivery from the battery to the motor based on throttle input or pedal assist level.
Regularly inspect the motor for any unusual noises or overheating. Ensure all wiring connections to the motor and controller are secure and free from damage. Avoid exposing the controller to excessive moisture, as this can cause malfunction.
The controller often features diagnostic lights indicating battery level and system status. Understanding these indicators is vital for monitoring performance and identifying potential issues.
Battery and Charger
The heart of your Jetson Electric Bike is its lithium-ion battery, providing the energy for your rides. Battery capacity, measured in Watt-hours (Wh), dictates the range you can achieve on a single charge. Always use the charger specifically designed for your Jetson battery; using an incompatible charger can cause damage or pose a safety risk.
Charging time varies depending on battery capacity and charger output. Avoid fully discharging the battery, as this can reduce its lifespan. Store the battery in a cool, dry place when not in use, away from direct sunlight and extreme temperatures.
Inspect the battery regularly for any signs of damage, such as swelling or leakage. Proper battery care is crucial for maximizing performance and longevity.
Assembly Instructions
Before your first ride, careful assembly is essential for safety and optimal performance. Begin by unpacking all components and verifying against the parts list. A step-by-step setup guide is provided to ensure a seamless process. First, attach the handlebar and stem, ensuring proper alignment and tightening of bolts. Next, securely mount the wheels, confirming they spin freely.
Install the pedals, noting the left and right designations. Double-check all connections for tightness using the provided tools. Refer to the wiring diagram for correct cable routing. If you encounter any difficulties, consult the detailed illustrations or contact customer support.
Proper assembly guarantees a safe and enjoyable riding experience.
Handlebar and Stem Installation
Begin by loosening the stem bolts on the fork steerer tube, allowing for handlebar insertion. Carefully insert the stem into the steerer tube to the desired height, ensuring sufficient clearance. Align the handlebar within the stem clamp, centering it for comfortable riding. Tighten the stem clamp bolts gradually and evenly, following the torque specifications outlined in the manual;
Verify proper alignment before fully tightening. Ensure the handlebar is securely fastened and doesn’t rotate within the clamp. Connect any integrated cables, such as brake lines or control wires, routing them neatly along the stem and handlebar. Double-check all bolts for tightness after the initial ride.
Proper installation ensures steering control and rider safety.
Wheel Attachment
Begin by ensuring the wheel is properly aligned with the fork dropouts or frame mounting points. Carefully insert the wheel axle into the dropouts, making sure it’s fully seated. For quick-release axles, securely close the lever, verifying it provides sufficient resistance. If using thru-axles, thread it into the designated mounting point and tighten to the specified torque.
Confirm the wheel spins freely without rubbing against the brake pads or frame. Double-check that the quick-release lever or thru-axle is firmly secured before each ride. Proper wheel attachment is crucial for safe and stable operation. Inspect the wheel for any damage before installation.
Secure attachment prevents accidents and ensures optimal performance.
Pedal Installation
Identify the left and right pedals – they are typically marked ‘L’ and ‘R’. The right pedal screws in clockwise, while the left pedal screws in counter-clockwise. This is a crucial distinction to avoid damaging the crank arms.
Apply a small amount of grease to the pedal threads before installation. Carefully thread the pedals into the crank arms by hand, ensuring they are not cross-threaded. Once hand-tight, use a pedal wrench to fully tighten each pedal, applying firm and even pressure.
Verify pedals are securely attached before riding. Loose pedals can cause damage and pose a safety hazard. Regularly check pedal tightness, especially after initial rides.
Charging the Battery
Before the first ride, fully charge the battery to optimize performance and lifespan. Locate the charging port on the battery pack or frame – consult the component overview for its exact location. Connect the charger to the charging port and then plug the charger into a standard wall outlet.
The charger’s indicator light will illuminate, typically red while charging and green when fully charged. Charging times vary depending on the battery’s state of discharge, but generally take between 4-6 hours for a complete charge.
Avoid overcharging the battery, as this can reduce its lifespan. Disconnect the charger once the indicator light turns green. Store the battery in a cool, dry place when not in use.
Charging Procedures
Ensure the electric bike is powered off before initiating the charging process. Connect the charger securely to the bike’s charging port, verifying a firm connection. Then, plug the charger into a grounded, standard electrical outlet – avoid using extension cords if possible.
Monitor the charger’s indicator light; a red light typically signifies charging, while a green or blue light indicates a full charge. Initial charging may take longer, up to 6-8 hours, but subsequent charges will be quicker.
Do not interrupt the charging cycle unless absolutely necessary. Disconnect the charger from both the bike and the outlet once charging is complete. Regularly inspect the charger and cable for any damage, and discontinue use if any are found.
Battery Maintenance
To maximize your Jetson Electric Bike battery’s lifespan, avoid fully discharging it before recharging. Partial charges are preferable to complete depletion. Store the battery in a cool, dry place, away from direct sunlight and extreme temperatures – ideally between 59°F and 77°F (15°C and 25°C).
If storing the bike for extended periods, charge the battery to approximately 50-60% capacity before storage, and then recharge it every 2-3 months to prevent degradation. Avoid leaving the battery connected to the charger for prolonged periods after it’s fully charged.
Regularly inspect the battery casing for any signs of damage, such as cracks or swelling. Do not attempt to disassemble or repair the battery yourself; contact a qualified technician for assistance.
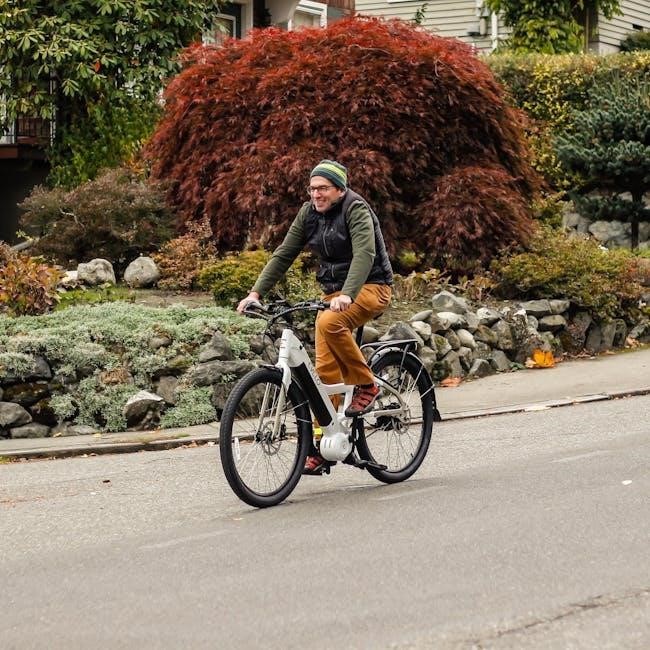
Operating Your Jetson Electric Bike
Before each ride, ensure all components are securely fastened and the battery is adequately charged. To power on your Jetson Electric Bike, locate the power button – typically near the battery compartment or handlebar – and press it until the indicator light illuminates. Familiarize yourself with the throttle and Pedal Assist System (PAS) controls.
The throttle allows for powered riding without pedaling, while PAS provides assistance as you pedal, offering varying levels of support. Select your desired PAS level for a comfortable and efficient ride. Always practice braking in a safe, open area to understand the bike’s stopping power.
Be mindful of local traffic laws and regulations while operating your e-bike, and always wear a helmet for safety.
Powering On/Off
Initiating operation of your Jetson Electric Bike is straightforward. Locate the primary power button, generally situated conveniently near the battery housing or integrated into the handlebar assembly. A firm, deliberate press of this button will activate the system, indicated by an illuminated LED display.
To ensure complete shutdown and conserve battery life, repeat the process – press and hold the power button until the LED extinguishes. Some models feature an additional key-operated switch for enhanced security; ensure the key is removed when powering off.
Always confirm the bike is fully powered off after each use to prevent accidental activation and potential energy drain. Proper powering on/off procedures contribute to the longevity of your e-bike’s components.
Throttle and Pedal Assist System (PAS)
Your Jetson Electric Bike offers two primary riding modes: throttle and Pedal Assist System (PAS). The throttle, typically a twist-grip or thumb lever on the handlebar, provides power independently of pedaling – simply twist or press to accelerate.
PAS engages the motor when you pedal, augmenting your effort with electric assistance. Selectable PAS levels, controlled via handlebar buttons, determine the degree of assistance. Lower levels offer a subtle boost, while higher levels provide significant power.
Experiment with both modes to find your preferred riding style. Remember to familiarize yourself with the PAS level indicators on the display. Smooth transitions between modes enhance your riding experience and optimize battery efficiency.
Braking System
Your Jetson Electric Bike is equipped with a high-performance braking system designed for safety and control. Typically, this includes both front and rear brakes – often mechanical disc brakes or V-brakes, though some models may feature hydraulic disc brakes for enhanced stopping power.
Familiarize yourself with the brake levers; the right lever usually controls the rear brake, and the left controls the front. Apply both brakes simultaneously for optimal stopping distance, especially at higher speeds. Avoid sudden, forceful braking, which can lead to skidding.
Regularly inspect brake pads for wear and tear, and ensure brake cables are properly adjusted. A well-maintained braking system is crucial for a safe and enjoyable riding experience. Always test your brakes before each ride!
Maintenance and Troubleshooting
Regular maintenance extends the life of your Jetson Electric Bike and ensures optimal performance. Key tasks include checking tire pressure weekly, lubricating the chain every 50-100 miles, and inspecting all bolts for tightness. A clean bike is a happy bike – wipe down the frame and components regularly.
If you encounter issues, start with simple checks; A flat tire can be addressed with a tire repair kit or replacement tube. For electrical problems, ensure the battery is fully charged and connections are secure. If the motor isn’t responding, consult the troubleshooting section of this manual.
For more complex issues, or if you’re uncomfortable performing repairs yourself, it’s best to consult a qualified bike mechanic. Prioritize safety and don’t attempt repairs beyond your skill level.
Tire Inflation and Chain Lubrication

Maintaining proper tire inflation is crucial for a smooth ride and extended tire life. Check your tire pressure before each ride using a reliable gauge. Recommended pressure (PSI) is printed on the tire sidewall – adhere to these guidelines. Under-inflated tires increase rolling resistance and risk of punctures, while over-inflation reduces grip.
Chain lubrication is equally important. A clean, well-lubricated chain minimizes friction, improves shifting performance, and prevents rust. Apply a bicycle-specific chain lubricant sparingly, wiping away any excess. Avoid using WD-40, as it attracts dirt.

Regularly inspect your chain for wear and tear. Replace it when it becomes stretched or damaged to prevent further component wear. Consistent tire inflation and chain lubrication contribute significantly to your Jetson Electric Bike’s longevity.

Basic Electrical Checks
Periodically inspecting the electrical components of your Jetson Electric Bike ensures safe and reliable operation. Before each ride, visually check all wiring connections for damage, fraying, or loose connections. Pay close attention to the connections at the battery, controller, motor, and display.
Confirm the battery is securely mounted and the charging port is clean and free of debris. Test the functionality of the lights (if equipped) and the display panel. Ensure all buttons and indicators are working correctly.
If you notice any sparking, unusual noises, or smells, immediately discontinue use and consult a qualified technician. Do not attempt to repair electrical components yourself unless you possess the necessary expertise. Regular basic electrical checks are vital for preventing potential hazards.
Common Issues and Solutions
Experiencing issues with your Jetson Electric Bike? Here’s a quick guide to common problems and their solutions. If the bike won’t power on, first check the battery charge and ensure all connections are secure. A faulty display can often be reset by disconnecting and reconnecting the battery.
Reduced range may indicate a degrading battery or improper charging habits. For throttle issues, inspect the throttle cable and connection. Braking problems often stem from cable adjustments or worn brake pads.

If you encounter persistent issues, consult the full troubleshooting section of the manual or contact Jetson customer support. Remember, attempting complex repairs without proper knowledge can void your warranty and potentially cause further damage. Prioritize safety and seek professional assistance when needed.
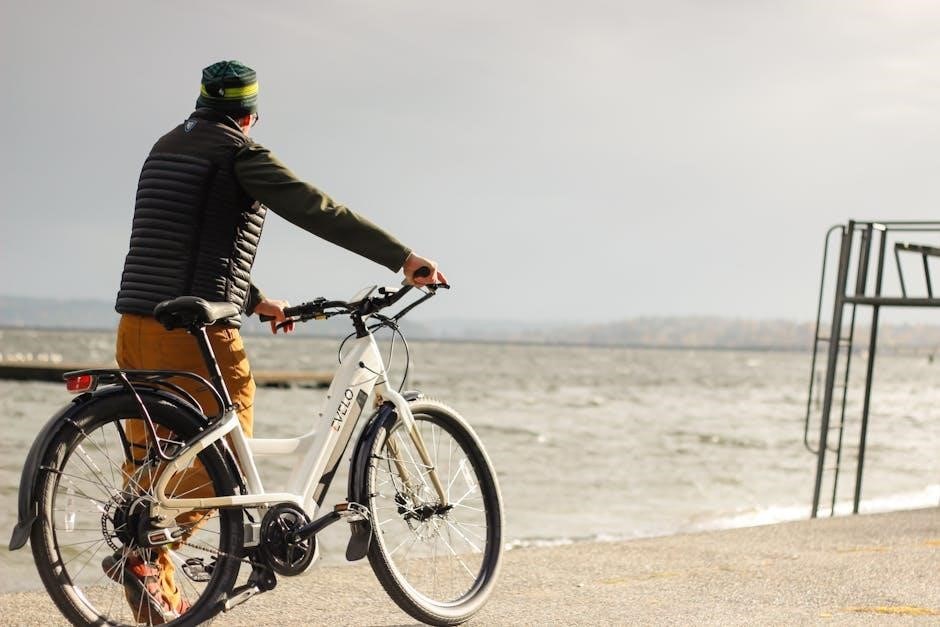
Safety Precautions
Prioritize your safety while riding your Jetson Electric Bike! Always wear a certified helmet, and consider additional protective gear like knee and elbow pads. Obey all local traffic laws and regulations, treating your e-bike as you would any other vehicle.
Be mindful of pedestrians and other cyclists, maintaining a safe following distance. Avoid riding under the influence of alcohol or drugs. Regularly inspect your bike before each ride, checking brakes, tires, and battery connections.
Never exceed the maximum weight capacity, and be cautious when riding in wet or slippery conditions. Familiarize yourself with the bike’s braking system and practice emergency stops in a safe environment. Remember, responsible riding ensures a fun and secure experience for yourself and others.
Warranty Information
Your Jetson Electric Bike is covered by a limited warranty against manufacturing defects for a period of one year from the original date of purchase. This warranty covers the frame, motor, battery, and controller under normal use.
Warranty exclusions include normal wear and tear, damage caused by accidents, misuse, neglect, unauthorized modifications, or improper maintenance. To initiate a warranty claim, please contact our customer support team with proof of purchase and a detailed description of the issue.
We will, at our discretion, repair or replace the defective component. Shipping costs for warranty claims are the responsibility of the customer. This warranty provides you with specific legal rights, and other rights may vary depending on your location.
Technical Specifications
Model: Jetson Electric Bike (specific model number varies). Motor: 350W Brushless Motor, providing efficient and reliable power. Battery: 36V 10Ah Lithium-ion Battery, offering a range of up to 20 miles on a single charge (range varies based on rider weight, terrain, and assist level).
Charging Time: 4-6 hours with the included charger. Maximum Speed: 20 mph (electronically limited). Frame Material: Lightweight Aluminum Alloy. Brakes: Front and Rear Mechanical Disc Brakes, ensuring reliable stopping power. Tires: 26” x 2;1” Puncture-Resistant Tires.
Weight Capacity: 265 lbs. Display: LCD Display showing speed, battery level, and assist level. Gear System: 7-Speed Shimano Derailleur. Dimensions: (L x W x H) 68” x 24” x 40”.
Regulatory Compliance
Important Notice: This Jetson Electric Bike is designed and intended for use in compliance with applicable local, state, and federal regulations. It’s the rider’s responsibility to understand and adhere to all laws governing electric bicycle usage in their specific jurisdiction.
Compliance Standards: The bike meets or exceeds standards set by [mention specific standards if known, e.g., CPSC, EN 15194]. Modifications to the bike may void compliance and potentially create safety hazards. Ensure the bike is operated within legal speed limits and on permissible roadways.
Radio Frequency Interference: This device complies with Part 15 of the FCC Rules. Operation is subject to the following two conditions: (1) This device may not cause harmful interference, and (2) this device must accept any interference received, including interference that may cause undesired operation.